Install Open WebUI in a Docker container on Windows 11: complete guide and practical tips
Looking to install Open WebUI on Windows 11 to get a modern and powerful interface for your LLM models without headaches? Good news: the most reliable and accessible method is installation via a Docker container. This tutorial walks you through step by step, even if you are a beginner, and shares tips to avoid common pitfalls. We will also cover the key points to check and best practices for a stress free setup.
Why install Open WebUI via Docker on Windows 11?
Before we dive in, remember that many methods exist to install Open WebUI: via pip or Python, conda, manual install from source code. But installing with Docker offers unbeatable advantages for most users, beginners and advanced alike:
- Simplicity: no dependency hell or Python version issues, everything is contained and isolated in a Docker container.
- Easy maintenance: update or remove with a single command.
- Security and stability: your main system stays clean, everything runs in a sandbox.
- Performance: Open WebUI runs very well under Docker, it does not need optimized GPU access. It is only an interface, while Ollama, vLLM, or more broadly LLM engines need GPU optimized inference.
Moreover, the official Open WebUI documentation (docs.openwebui.com) and user feedback on Reddit (reddit.com) recommend this method.
Prerequisites before installing Open WebUI in Docker on Windows 11
Before starting the installation of Open WebUI in a Docker container, make sure you have:
- Ollama installed on Windows 11, the LLM engine that runs the models, already working.
- Docker Desktop installed and configured on your machine (download here).
- Administrator access on your computer, required for some network operations.
Note: Open WebUI does not run LLM models, it is a web interface only. Ollama manages GPU power and model inference. You can install Open WebUI in Docker without limiting your AI performance and you do not need to enable GPU optimizations on the container.
Step 1 – Verify that Ollama runs correctly on Windows 11
Before moving to Docker, make sure Ollama is running and working on your PC:
- Open the Windows terminal, cmd or PowerShell.
- Type: ollama list If the command responds without error, Ollama is operational on http://localhost:11434.
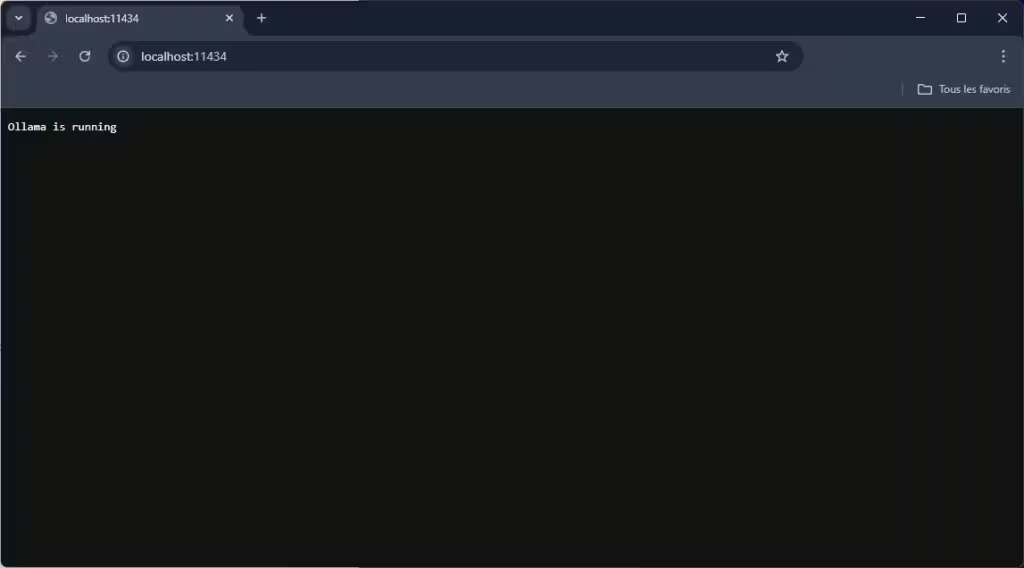
If Ollama does not respond, fix that issue before installing Open WebUI.
Step 2 – Install and start Docker Desktop
If not already done, install Docker Desktop for Windows.
After installation:
- Launch Docker Desktop, an icon should appear in the system tray.
- Wait until Docker shows “Docker Desktop is running”.
- Heads up: Docker Desktop requires virtualization enabled in BIOS and ideally WSL2. Follow the instructions shown if startup fails.
Step 3 – Run Open WebUI in a Docker container
This is where the magic happens. Open PowerShell or a terminal, ideally as administrator, and copy this command:
docker run -d -p 3000:8080 --add-host=host.docker.internal:host-gateway -v open-webui:/app/backend/data --name open-webui --restart always ghcr.io/open-webui/open-webui:mainOption details:
- -p 3000:8080: the interface will be available at http://localhost:3000
- –add-host=host.docker.internal:host-gateway: gives Docker access to Ollama running on Windows
- -v open-webui:/app/backend/data: persists user data in a Docker volume
- -e OLLAMA_BASE_URL=http://host.docker.internal:11434: configures Open WebUI to communicate with native Ollama
- –restart unless-stopped: restarts the container automatically when the PC reboots
When you run the command, Docker downloads what is needed, Open WebUI and its dependencies:
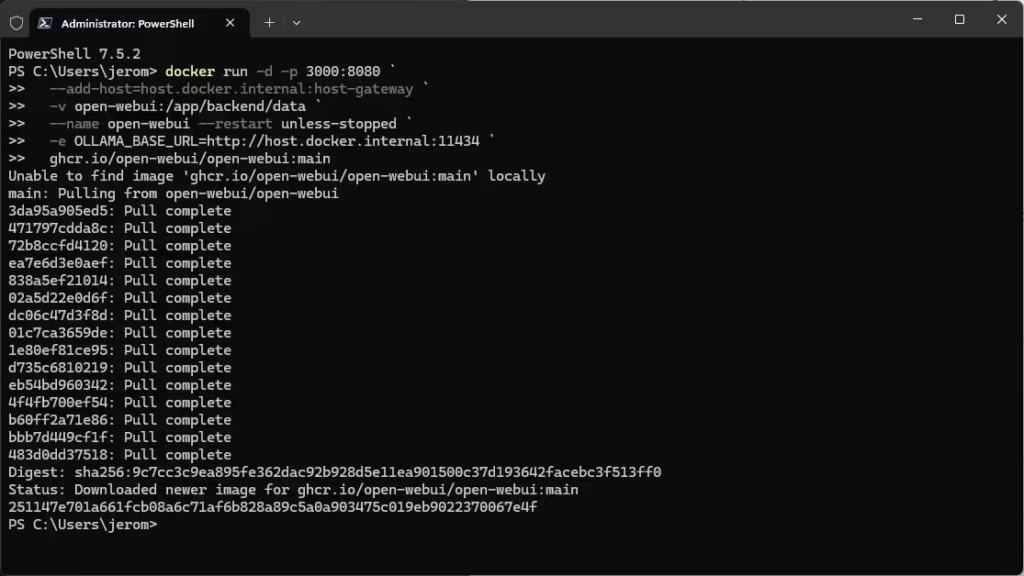
👉 For more details, see the official Open WebUI docs.
If port 3000 is already in use, change it, for example -p 3100:8080.
Step 4 – Access the Open WebUI interface
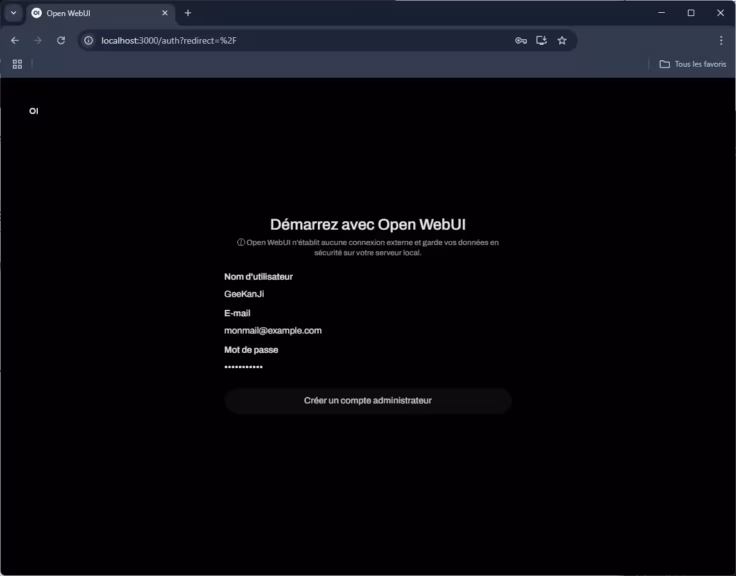
- Open your preferred browser and go to http://localhost:3000

- On first login, create your admin account. An account is required but it is local only, information is not sent to a remote server. Open WebUI can be used by several people on your local network, or even externally with the right setup, which justifies creating an Administrator account.
- Open WebUI will automatically detect Ollama via the configured address. If not, open settings and fix the backend URL.
Step 5 – Test your Open WebUI and Ollama installation
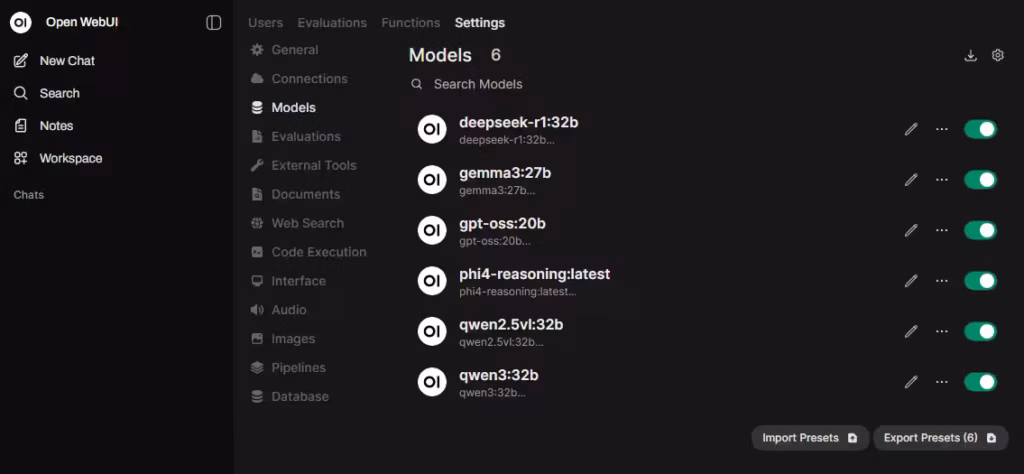
If you have not installed models with Ollama yet, you can do it directly from Open WebUI using this URL: http://localhost:3000/admin/settings/models if you kept the default port 3000. Go to the list of available models on the Ollama site with this link, pick a model, open its page, and you will get the reference to use, for example: deepseek-r1:32b or gemma3:27b
I recommend skimming this page to learn how to choose LLM models based on your hardware.
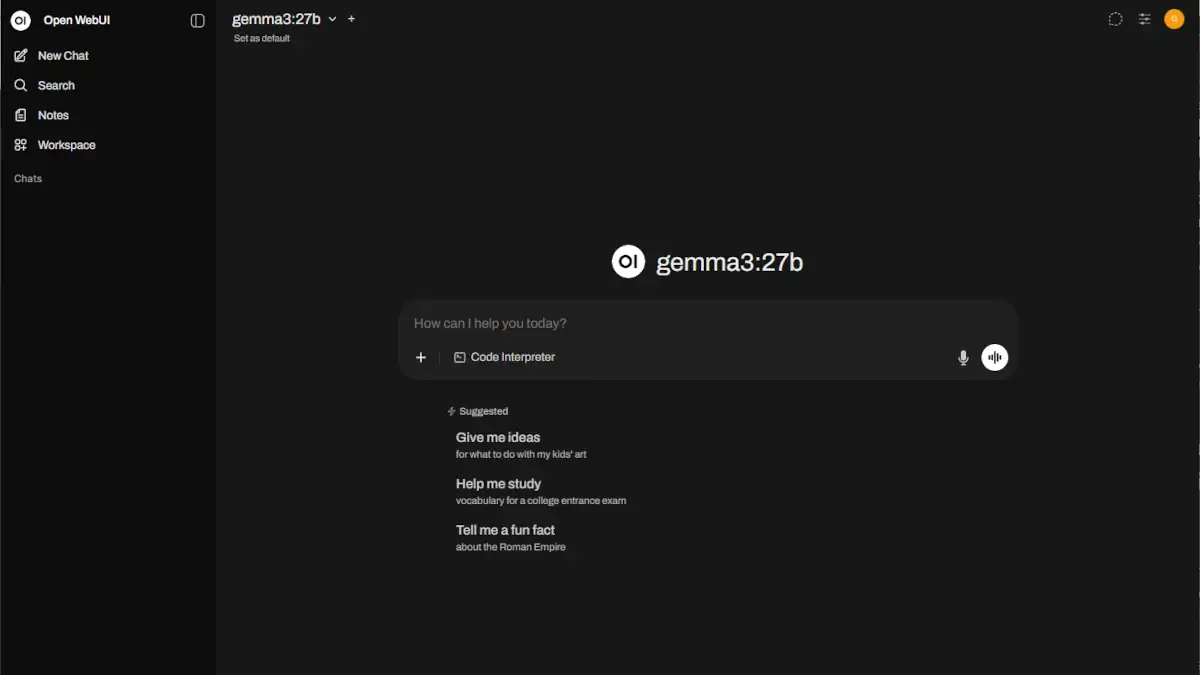
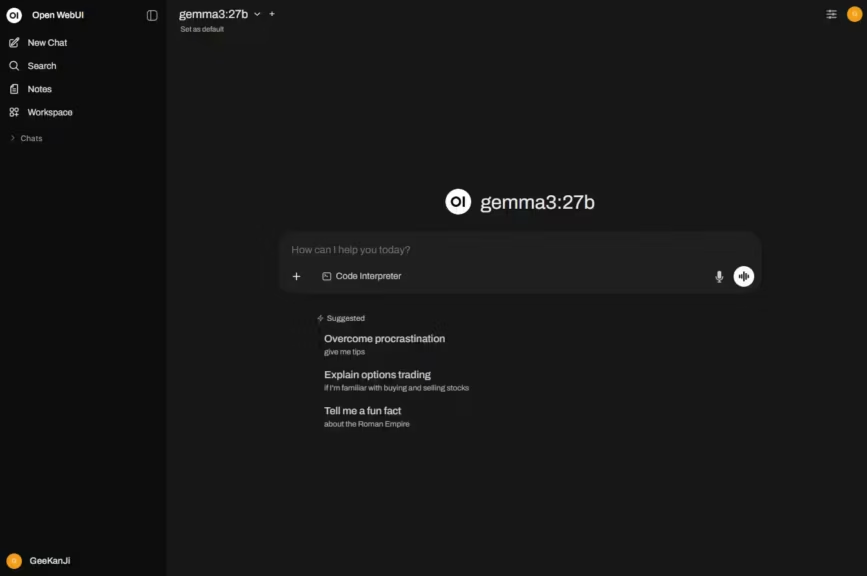
In the Open WebUI chat interface:
- Select an Ollama model, Llama, Gemma, Phi, etc.
- Type a test prompt
- Check that the response arrives without errors
If something blocks:
- Verify that Ollama is still running, ollama list
- Make sure Windows Firewall does not block communication between Docker and Ollama
- Check the Open WebUI FAQ if errors persist
If you have multiple network interfaces, or if you use a VPN, routing issues may need fixing.
Alternative: install with a docker compose file
Personally, using a docker-compose.yml file is more convenient, even for a single container. It is easier to maintain, tweak parameters, and update the image with a simple “docker compose pull”. Finally, if I need it to communicate with another container, I can put them on the same network more easily. In short, it is a matter of preference.
Open WebUI installation with docker-compose.yml in short:
- Go to your projects directory, for example /srv
- Create a directory: mkdir open-webui then cd open-webui
- Create an empty docker-compose.yml file: touch docker-compose.yml
- With Windows Explorer or Visual Studio Code, edit the file like this:
services:
  open-webui:
    image: ghcr.io/open-webui/open-webui:main
    container_name: open-webui
    restart: always
    ports:
      - "3000:8080"
    extra_hosts:
      - "host.docker.internal:host-gateway"
    volumes:
- open-webui:/app/backend/data- Finally start the service
docker compose up -dTips and practical advice
- Update Open WebUI: in the menu “Settings”, then “About”, click “Check for available updates”.
- Persistent data: your history, settings, and accounts are saved in the Docker volume, even after an update.
- Change the access port: modify the -p option if needed.
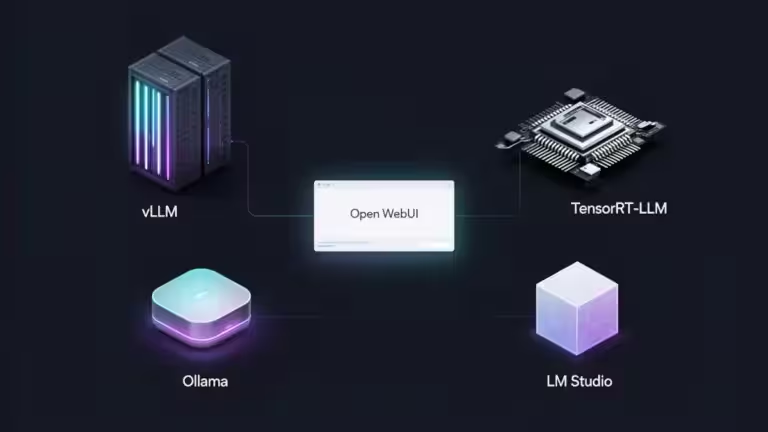
- Use another AI backend: you can connect Open WebUI to other compatible engines.
Limits and other methods to explore
Even if this Docker method is the simplest and most recommended, there are other ways to install Open WebUI on Windows 11:
- Direct installation via pip and Python 3.11
- Using Conda or uvx virtual environments
- Build from GitHub sources, for advanced developers
- Windows service via NSSM, to start Open WebUI at boot
For more information, check the Open WebUI without Docker install guide.
Conclusion
Installing Open WebUI in a Docker container on Windows 11 is the ideal solution to quickly benefit from a modern interface for your AI models while avoiding technical complexity and incompatibility risks. The method presented here suits beginners and advanced users alike, a reliable, modular, and easy to maintain configuration.
Need help or want to explore more advanced use cases? The Open WebUI forums and the official documentation are excellent resources to go further.
Open WebUI and Docker on Windows 11 FAQ
It is a modern web interface to interact with LLMs, Large Language Models, via Ollama, or other compatible backends. It does not run any model itself.
Docker avoids dependency headaches, provides a clean environment, and separates Open WebUI from the rest of the system.
→ See the advantages in the official docs.
No, Ollama can stay native, Open WebUI will connect to it over the local network. This is the simplest solution on Windows.
No, only Ollama needs a GPU if you use models that support it.
In the Open WebUI UI, Settings then About then Check for available updates.
Otherwise: docker stop open-webui docker rm open-webui docker pull ghcr.io/open-webui/open-webui:main
Then rerun the initial install command.
Everything is in the Docker volume open-webui:/app/backend/data by default.
Tip: you can back it up with:docker run u002du002drm -v open-webui:/data -v ${PWD}:/backup busybox tar cvf /backup/open-webui-backup.tar /data
Docker Desktop is not running
Windows Firewall blocks the port
Port already in use, change it with -p 3100:8080 for example
Change the OLLAMA_BASE_URL environment variable when launching the Docker container.
Example:-e OLLAMA_BASE_URL=http://other_backend_ip:port
Automated installation script for Open WebUI and Docker on Windows 11
Here is a PowerShell script to copy and paste to automate everything:
# 1. Verify Docker Desktop is running
Start-Process "Docker Desktop" -ErrorAction SilentlyContinue
Start-Sleep -Seconds 10

# 2. Launch the Open WebUI container
docker run -d -p 3000:8080 `
  --add-host=host.docker.internal:host-gateway `
  -v open-webui:/app/backend/data `
  --name open-webui --restart unless-stopped `
  -e OLLAMA_BASE_URL=http://host.docker.internal:11434 `
  ghcr.io/open-webui/open-webui:main

Write-Host "Open WebUI installed. Access http://localhost:3000"
It is recommended to run this script as administrator.
Comparison of the main Open WebUI installation methods on Windows 11
| Method | Simplicity | Isolation | Maintenance | For whom? |
|---|---|---|---|---|
| Docker | ★★★★★ | ★★★★★ | ★★★★★ | 95% of users |
| pip or Python | ★★★★☆ | ★★☆☆☆ | ★★☆☆☆ | Python developers |
| Conda or uvx | ★★★☆☆ | ★★★☆☆ | ★★★☆☆ | Data scientists |
| GitHub or from source | ★★☆☆☆ | ★★★★★ | ★☆☆☆☆ | Advanced users |
| Windows service, nssm | ★★★☆☆ | ★★★★☆ | ★★★★☆ | Auto start use cases |
- Docker: isolated, reliable, easy to update, low maintenance.
- pip or Python: fast, but dependencies and conflicts may occur.
- Conda or uvx: ideal if you already have a Python or Conda workflow.
- GitHub, source: for advanced customization, more complex.
- Windows service, nssm: ideal for deep Windows integration, but more technical.
Also read :
- Install vLLM with Docker Compose on Linux (compatible with Windows WSL2)
- Windows 11 Backup and WSL Environments: Reliable Solutions Guide
Your comments enrich our articles, so don’t hesitate to share your thoughts! Sharing on social media helps us a lot. Thank you for your support!