Unsloth on Docker: easy installation on Linux and Windows 11 (WSL2)

Installing Unsloth can seem intimidating, especially when starting out with AI model training and intensive GPU usage. With Docker and docker-compose, deployment becomes much simpler, reproducible and easier to maintain, whether you are running native Linux or Windows 11 with WSL2. This is the method I recommend to avoid wasting time on dependency issues and to improve maintainability..
In this article, we will go step by step through the installation of Unsloth on Docker, especially for NVIDIA Blackwell GPUs such as the RTX 5090. We will use a docker-compose.yml file to centralize the configuration. This avoids repetitive command errors and ensures that you or your collaborators can reproduce exactly the same environment at any time.
The information and best practices presented here are based on the official Unsloth documentation, the unsloth/unsloth image page on Docker Hub and the Unsloth GitHub repository.
Why choose Docker for Unsloth?
Installing Unsloth directly on your system can quickly become complex, with CUDA versions to manage, specific dependencies and PyTorch compatibility. Docker solves this problem by encapsulating everything in an image. You download, run and it works.
With docker-compose, the advantages are even more obvious:
- Simplicity: all options (volumes, ports, GPU) are described once in a YAML file.
- Reduced maintenance: updating the image requires only one command.
- Reproducibility: you can share the docker-compose.yml file across your workstations, servers or with colleagues, they will all have the same configuration.
- Compatibility: the unsloth/unsloth images are designed for RTX GPUs.
Prerequisites for Linux and Windows 11 (WSL2)
Before starting, make sure you have:
- An NVIDIA compatible GPU (e.g. RTX 5090) with up-to-date drivers.
- Docker installed (on native Linux or within WSL2).
- The NVIDIA Container Toolkit correctly configured so Docker can access the GPU. If it is not already installed, follow this guide. Also check the required version in the Unsloth documentation. The version may change, so it is not listed here.
Example docker-compose.yml file
Here is a complete example to deploy Unsloth with Docker Compose. Place this in your project directory, for example ~/srv/unsloth:
services:
  unsloth:
    image: unsloth/unsloth:stable
    container_name: unsloth
    # GPU
    gpus: all
    # Shared RAM memory (datasets + fast dataloaders), adapt to your system
    shm_size: "32g"
    ipc: host
    # Working directory inside the container
    working_dir: /workspace
    environment:
      - TZ=Europe/Paris
      # Hugging Face / Torch caches and models
      - HF_HOME=/data/hf
      - HUGGINGFACE_HUB_CACHE=/data/hf
      - TRANSFORMERS_CACHE=/data/hf
      - TORCH_HOME=/data/torch
      - JUPYTER_PASSWORD=pwdjupyter
      - USER_PASSWORD=pwdunsloth
    volumes:
      # Code, scripts, notebooks
      - ./workspace:/workspace
      # Hugging Face / tokenizer caches (persistent)
      - ./data/hf:/data/hf
      - ./data/torch:/data/torch
      # Datasets in read mode
      - ./data/datasets:/datasets
      # Training checkpoints and outputs
      - ./data/checkpoints:/checkpoints
      - ./outputs:/outputs
    # Default command; replace with your training command if needed
    command: bash
    # Optional: if you want to run a notebook inside
    ports:
       - "8888:8888"
Explanation of volumes
- ./workspace: scripts, notebooks, user code.
- ./data/hf and ./data/torch: Hugging Face and Torch caches to avoid re-downloading models.
- ./data/datasets: your datasets in read-only mode.
- ./data/checkpoints: storage for training checkpoints.
- ./outputs: logs, metrics and exports.
With this structure, everything is persistent on your host machine, even if you delete or recreate the container.
Start the container
- Create the necessary directories:
mkdir -p workspace data/hf data/torch data/datasets data/checkpoints outputs- Launch the container:
docker compose up -d- Check that it is running:
docker psYou should see unsloth with the port mapping 0.0.0.0:8888->8888/tcp.
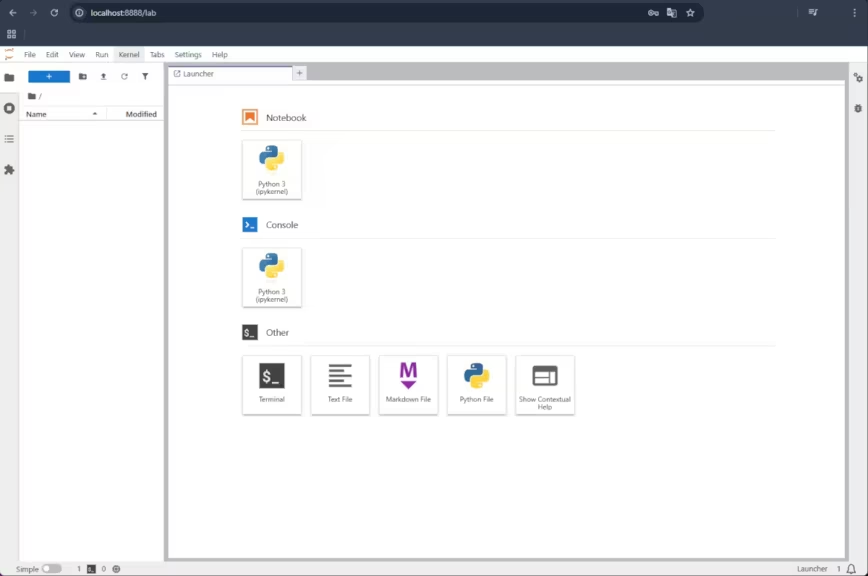
Access Jupyter Notebook
Open your browser and go to: http://localhost:8888
A login screen will appear. Enter the password you defined in your docker-compose.yml file with the variable JUPYTER_PASSWORD.
You are now inside the Jupyter Notebook interface integrated into Unsloth. You can start with the notebooks provided by the team (see the Fine-tuning Guide section in the Unsloth documentation).
Access the container terminal
For some operations (installing packages, exploring files, running scripts), command line access is often more efficient than Jupyter.
No need for SSH locally:
docker compose exec unsloth bashThis opens a Bash shell directly inside the container, with access to /workspace, /datasets and your mounted volumes.
Things to check and possible improvements
- CUDA / driver compatibility: depending on your Windows driver version and the NVIDIA Container Toolkit, mismatches can occur. [To be checked on your system].
- GPU resources: the example uses gpus: all, but you can limit it to a specific GPU if you have several.
- Security: in local use this is not critical, but if you expose port 8888 on a network, always define a strong JUPYTER_PASSWORD and ideally use a secure reverse proxy.
- Performance: the parameter shm_size: “32g” is important for PyTorch DataLoaders. Adjust it if your host has less RAM available.
Permission issues and possible solutions
When installing Unsloth with Docker, it is common to see Permission denied errors in Jupyter Notebook when trying to create a file (e.g. untitled.txt). This happens because the Unsloth image does not run as root by default, but with a non-root user called unsloth (UID 1000, GID 1000). If your mounted directories (workspace, data, outputs) belong to another user, unsloth cannot write to them.
Common symptoms
- Unable to create a new file from Jupyter (Permission denied).
- Unable to save checkpoints or logs in /checkpoints or /outputs.
Possible solutions
- Quick fix with permissions
For local use (Linux or WSL2), you can grant full access to the directories:
sudo chmod -R 777 workspace data outputsThis works but gives full access to all system users. Acceptable in local setups, not recommended in production.
- Assign folders to the unsloth user
A cleaner method is to change ownership of the mounted directories to match the unsloth UID/GID:
sudo chown -R 1000:1000 workspace data outputsThis way, the container’s user has the correct permissions.
- Use USER_PASSWORD for sudo inside the container
If you sometimes need to run administrative commands inside the container, define in your docker-compose.yml:
environment:
  - USER_PASSWORD=myuserpassword
This allows you to use sudo with the defined password, while Jupyter and scripts still run as the unsloth user.
- Read-only volumes for some data
If you have folders that must not be modified (for example datasets), you can mount them in read-only mode in docker-compose.yml:
- ./data/datasets:/datasets:roBest practices
- For local development: chmod 777 is the simplest solution.
- For shared or production environments: prefer chown 1000:1000 and :ro volumes for datasets.
- Always set JUPYTER_PASSWORD and optionally USER_PASSWORD to maintain a minimum level of security and avoid blocking issues.
These adjustments ensure your notebooks, checkpoints and exports run without errors in Unsloth, whether on Linux or WSL2.
Conclusion
With Docker and docker-compose, installing Unsloth on Linux and Windows 11 via WSL2 is greatly simplified. No need to juggle CUDA or PyTorch manually, the official unsloth/unsloth:stable image already includes everything to leverage your Blackwell GPU.
With a simple docker compose up -d, you get a reproducible environment ready to launch your notebooks and AI training scripts.
To go further, explore the Unsloth GitHub repository for advanced examples, or follow the guides in the official documentation.
Your comments enrich our articles, so don’t hesitate to share your thoughts! Sharing on social media helps us a lot. Thank you for your support!