Prompting LTX 2.3: The Techniques That Actually Work
LTX 2.3 is capable of producing impressive videos locally, but it is also far more demanding than most image generation models. Many users quickly discover that prompts that work perfectly with Flux, SDXL, or Midjourney can lead to unstable motion, inconsistent characters, or scenes that are difficult to control.
After months of testing, producing videos, and exchanging feedback with advanced ComfyUI users and the wider AI video community, several best practices have emerged. This guide brings together the most effective techniques for improving motion consistency, preserving character identity, and gaining better control over your video generations.
Why LTX 2.3 is different from image generators
Most users discover LTX 2.3 after working with image generation models such as Flux, SDXL, Midjourney, or similar tools. This is often where the first frustration appears: a prompt capable of generating an exceptional image does not necessarily produce a good video.
The reason is simple. An image only needs to be coherent at a single moment in time. A video must remain coherent throughout its entire duration. Your prompt therefore has to account for both space and time.
When you ask an image model to generate a character, it only needs to create one believable face. A video model must ensure that the same face maintains:
- its proportions;
- its expressions;
- its lighting;
- its hairstyle;
- its clothing;
across dozens or even hundreds of frames.
The challenge becomes even more complex once movement is involved. The model must simultaneously manage:
- the subject;
- the animation;
- camera motion;
- environmental interactions;
- temporal consistency across the entire sequence.
This is precisely why many highly popular image-generation prompts perform poorly with LTX 2.3.
For example:
epic cinematic masterpiece
stunning
award-winning
beautiful composition
ultra detailed
These terms may slightly influence the overall aesthetic, but they provide almost no useful information about motion.
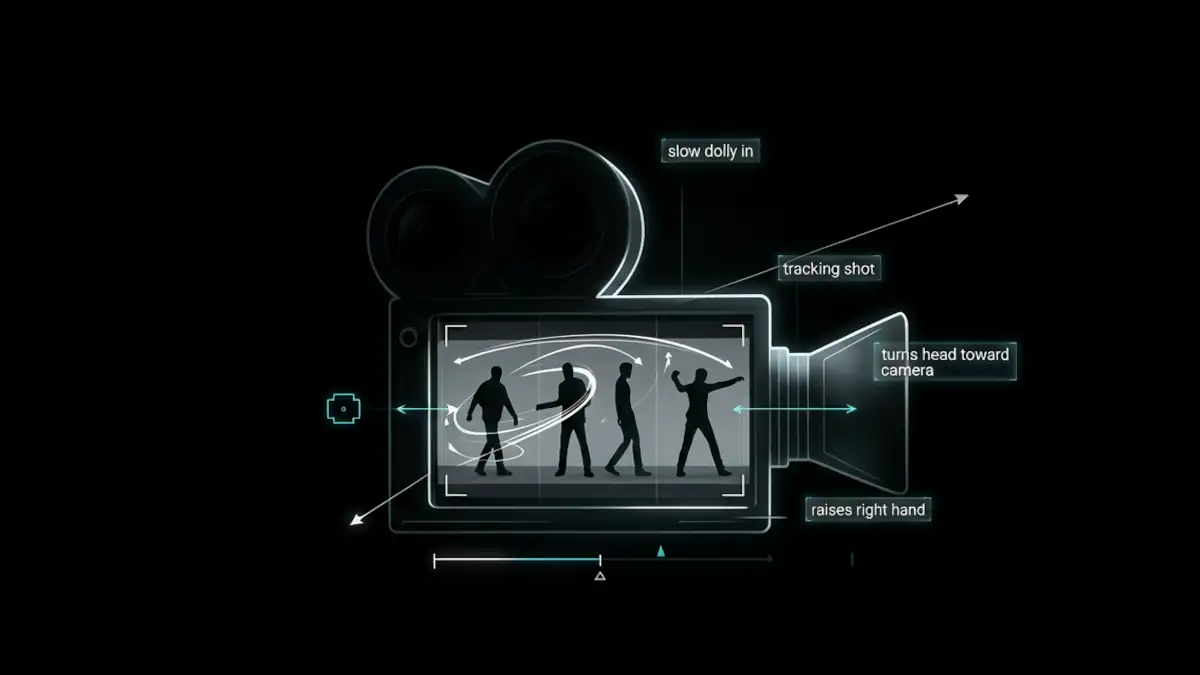
By contrast:
slow dolly in
turns head toward camera
raises right hand
tracking shot
walks forward
describes concrete actions and camera movements that the model can interpret much more effectively.
This is why the best LTX prompts often look more like filmmaking directions than traditional artistic prompts.
Before discussing optimization, it is important to adopt a different mindset:
With LTX 2.3, you are not simply describing an image. You are describing a scene that must evolve over time.
This fundamental difference explains most of the issues encountered by beginners.
Rule #1: Describe Physics, Not Emotions
One of the most common mistakes is relying on emotional adjectives or abstract concepts and expecting the model to automatically translate them into convincing visual behavior.
For example:
A furious manThis seems perfectly clear to a human. Yet the instruction leaves a huge amount of room for interpretation.
What does anger actually look like?
- A clenched jaw?
- Furrowed brows?
- Rapid breathing?
- An intense stare?
- Abrupt movements?
The model has to guess.
The more interpretation it must perform, the greater the risk of inconsistency and the more iterations you will typically need.
In my own testing, as well as in feedback from the community, results tend to become noticeably more stable when emotions are replaced with their physical manifestations.
Example
Abstract prompt:
A furious man shouting.More effective prompt:
A man with a tightened jaw,
furrowed brows,
wide-open mouth,
visible neck tension,
heavy breathing.
The second prompt provides concrete elements that can be animated rather than a vague concept that must be interpreted.
The same principle applies to virtually every emotion.
| Emotion | Physical description |
|---|---|
| Sadness | Head lowered, slow blinking, slumped shoulders |
| Anger | Tightened jaw, narrowed eyes, tense posture |
| Fear | Wide eyes, rapid breathing, trembling hands |
| Joy | Slight smile, relaxed posture, raised cheeks |
The more physical and observable your description is, the more usable information LTX 2.3 has available to generate a coherent animation.
This is arguably the most important mindset shift when moving from image generation to video generation.
Rule #2: Camera Direction Is Often More Important Than Style
When starting with LTX 2.3, it is tempting to stack artistic adjectives in the hope of improving visual quality:
epic
cinematic
beautiful
masterpiece
stunning
award-winning
This vocabulary is extremely common in image-generation prompts. In video generation, however, its impact is often limited.
Community feedback and extensive testing with LTX 2.3 consistently show that filmmaking-oriented language tends to produce more predictable and controllable results.
Why?
Because these terms directly describe how the camera behaves and how the scene evolves over time.
The words that actually add information
Instead of writing:
A beautiful cinematic portrait of a woman.Try:
Medium close-up shot,
slow dolly in,
soft side lighting,
shallow depth of field.
The second prompt provides several actionable pieces of information:
- framing;
- camera movement;
- lighting;
- depth of field.
The model now has far clearer guidance for constructing the sequence.
Particularly useful terms
Shot sizes
close-up
medium close-up
medium shot
wide shot
extreme close-up
Camera movements
slow dolly in
slow dolly out
tracking shot
handheld camera
push in
pull back
Depth management
shallow depth of field
deep focus
background blur
foreground blur
Lighting
soft daylight
rim lighting
side lighting
overhead lighting
ambient neon glow
Practical comparison
Style-oriented prompt:
A stunning cinematic futuristic soldier,
epic atmosphere,
masterpiece,
ultra detailed.
Camera-oriented prompt:
Medium close-up shot of a futuristic soldier,
slow dolly out,
soft rim lighting,
shallow depth of field,
post-apocalyptic street background.
In practice, the second prompt generally provides far more control over the final result.
The goal is not to completely eliminate artistic language. These terms can still help establish the mood of a scene.
However, when prompt space becomes limited, it is usually better to spend tokens on framing, movement, lighting, and scene direction rather than stacking aesthetic adjectives.
Rule #3: Break Complex Motions Into Micro-Actions
Another common mistake is asking the model to perform a complex action without providing enough information about how that action should unfold.
Consider the following example:
A woman dances energetically.
To a human, the scene seems straightforward.
To the model, it is highly ambiguous.
Dancing could mean:
- spinning;
- raising arms;
- jumping;
- moving forward;
- stepping backward;
- performing an entire choreography.
The model is forced to invent a large portion of the motion by itself.
This is often where users encounter:
- distorted arms;
- unstable legs;
- inconsistent movement;
- morphing artifacts.
The micro-action method
Experienced users generally achieve better results by breaking complex actions into simple, sequential movements.
Instead of:
A woman dances energetically.Try:
A woman raises her right arm,
rotates her shoulders,
takes one step forward,
slight smile,
smooth body movement.
The model now receives a sequence of actions that are much easier to interpret.
Why does this work better?
Each action contains:
- a starting point;
- a direction;
- an expected outcome.
LTX 2.3 has far fewer gaps to fill.
This approach often improves:
- limb stability;
- motion fluidity;
- temporal consistency;
- prompt adherence.
For dance videos, however, I strongly recommend using reference videos, OpenPose files, or pose skeletons through ControlNet, OpenPose, or similar guidance systems.
Particularly difficult actions
Some scenarios remain challenging for most current video models:
two people fighting
crowd running
complex choreography
wrestling
group dancing
Even with a well-crafted prompt, these scenes often require:
- multiple attempts;
- multiple seeds;
- post-production editing.
Whenever possible, it is usually more effective to simplify the action and rely on fast editing with short, dynamic shots rather than asking the model to generate a highly complex sequence in a single clip.
A useful rule of thumb is:
The larger the motion, the more precisely it should be described.
Rule #4: Preserve Character Identity Across Multiple Shots
One of the biggest challenges in AI video generation is maintaining a consistent character throughout a sequence.
Even when individual shots look correct on their own, it is common to see:
- hair color changes;
- slightly different clothing;
- gradual facial drift;
- changing proportions;
- lighting variations that significantly alter appearance.
These issues become especially noticeable when multiple generations are assembled into a single edit.
Why does identity drift happen?
Unlike a real film production, LTX 2.3 has no inherent concept of a persistent character. During every generation, the model simply reconstructs what your prompt describes.
The most reliable solution is to use a reference image of the character.
Without a reference image, even small prompt variations can cause the model to interpret the character as an entirely different person.
Elements to keep consistent
To improve continuity across multiple shots, try to preserve:
- the same hairstyle;
- the same clothing;
- the same color palette;
- the same lighting style;
- the same focal length;
- the same facial features.
For example:
Short brown buzzcut,
dark leather jacket,
35mm lens,
soft daylight,
light beard.
Reusing the exact same descriptors from shot to shot usually produces better results than constantly rephrasing them.
That said, without a reference image, maintaining character identity remains extremely difficult.
The importance of framing
Large framing changes within a sequence increase the risk of identity drift.
For example:
Wide shotfollowed immediately by:
Extreme close-upWhenever possible, transition progressively:
Wide shot
→ Medium shot
→ Medium close-up
→ Close-up
This approach generally improves camera motion quality while reducing unnecessary model creativity.
Specialized workflows
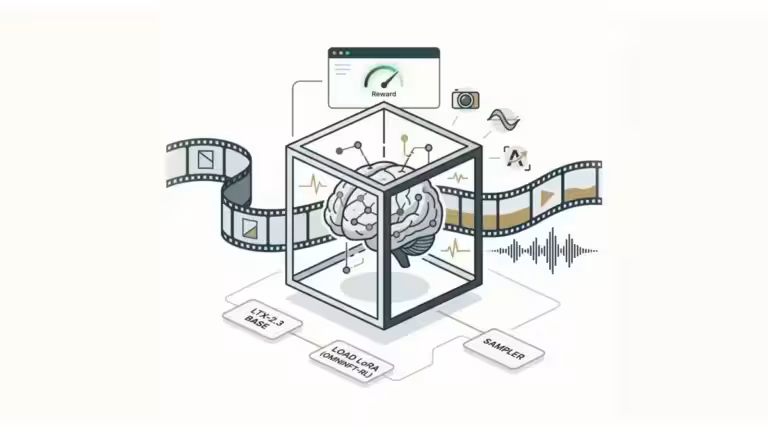
If you use ComfyUI, many advanced workflows rely on:
- reference images (Image-to-Video);
- identity injection systems (IC LoRA, ID LoRA);
- ControlNet guidance such as Pose, Depth, or Canny;
- inpainting, outpainting, repainting, and other specialized workflows.
These tools can significantly improve consistency when building longer sequences or recurring characters.
Rule #5: Remove Unnecessary Words Through Prompt Compression
A common misconception is that a longer prompt automatically produces a better video. In practice, this is often not the case.
LTX 2.3 must interpret every word in your prompt. When too many secondary details are included, the information that truly matters can become diluted.
Example of an overloaded prompt
A beautiful young man sitting peacefully on a wooden bench
during a wonderful summer afternoon while looking at the camera
with a very happy expression and amazing cinematic lighting.
This prompt works.
However, a large portion of the text contributes little useful information.
Compressed version
Young man,
wooden bench,
looking at camera,
slight smile,
soft daylight.
In many cases, this shorter version produces results that are equally good—or sometimes even better.
What should you keep?
Prioritize information that directly influences:
- the subject;
- the action;
- the camera;
- the lighting;
- the environment;
- the audio.
What can often be removed?
Avoid stacking terms such as:
beautiful
stunning
amazing
masterpiece
epic
award-winning
incredible
These words are not completely useless, but they generally have far less impact than concrete instructions related to motion, camera work, or scene structure.
The objective is not to create the shortest prompt possible.
The objective is to remove everything that does not directly contribute to the desired result and may introduce noise into the generation process.
Rule #6: Use Timecodes Carefully
Timecodes are probably one of the most debated techniques within the LTX community.
Contrary to some assumptions, this method is not officially documented by Lightricks. However, during my own testing and through extensive community feedback, simple temporal markers often appear to improve scene progression and action sequencing.
Example
[00:00] A man sitting at a desk.
[00:02] He slowly turns his head left.
[00:04] He raises his hand to his chin.
The goal is not to force the model to execute an action at an exact frame.
Instead, timecodes seem to act more like progression markers that help the model understand how the scene should evolve.
For example, a timecode that exceeds the actual duration of the shot may still be interpreted correctly by LTX 2.3. As long as the dialogue and actions remain plausible within the clip duration, the model generally understands the intended sequence.
When this technique can help
Timecodes may be useful when:
- multiple actions must occur in sequence;
- the scene contains several distinct movements;
- the animation tends to freeze;
- dialogue, sound effects, and actions are generated in the wrong order.
When they provide little benefit
For simple scenes such as:
Woman walking forward.or:
Man talking to camera.timecodes are often unnecessary.
A heuristic, not a rule
It is important to view this technique as an empirical workflow optimization rather than a guaranteed feature.
In some scenarios, the improvement is obvious.
In others, the effect is minimal or even imperceptible.
As with most AI video workflows, the best approach is to test multiple variations of the same scene and compare the results.
For official recommendations and updates regarding LTX 2.3, regularly consult:
- Official Documentation: https://docs.ltx.video/
- Official GitHub: https://github.com/Lightricks/LTX-Video
- Official Model: https://huggingface.co/Lightricks/LTX-2.3
The next section covers another topic that frequently sparks debate within the community: the Prompt Enhancer.
Rule #7: Master the Prompt Enhancer Instead of Letting It Control You
Many LTX 2.3 workflows are distributed with an automatic prompt enhancement system. In the ComfyUI ecosystem, this usually comes in the form of the TextGenerateLTX2Prompt node or a similar module integrated into certain workflows.
Its purpose is straightforward: transform a short idea into a more detailed prompt optimized for LTX 2.3.
For example:
Woman walking in a city.may become:
A young woman confidently walking through a futuristic neon-lit city street at sunset, cinematic atmosphere, reflective wet pavement, vibrant colors, detailed architecture...On paper, this sounds useful.
In practice, the results are more nuanced.
Why the Prompt Enhancer can create problems
In my own testing, as well as in feedback from other users, prompt enhancement systems sometimes introduce:
- unwanted objects;
- unnecessary environmental details;
- lighting changes;
- framing modifications;
- unexpected camera movements.
In other words, the system can improve a vague prompt, but it can also degrade a prompt that was already well structured.
When to use it
The Prompt Enhancer remains useful in several situations:
| Situation | Recommended |
|---|---|
| Discovering the model | Yes |
| Generating ideas | Yes |
| Creative exploration | Yes |
| Rapid prototyping | Yes |
If you are starting from a simple concept and looking for inspiration, it can generate useful variations.
When to disable it
Conversely, it is often better to disable the Prompt Enhancer when working on:
| Situation | Recommended |
|---|---|
| Serious video production | No |
| Precise camera control | No |
| Image-to-Video workflows | No |
| Audio-to-Video workflows | No |
| Shot-by-shot production | No |
The more control you need, the less useful automatic prompt expansion generally becomes.
A practical workflow
When developing a new scene:
- Generate a few ideas with the Prompt Enhancer.
- Select the variation you prefer.
- Rewrite the final prompt manually.
- Disable the enhancer for production.
This approach usually combines the best of both worlds:
- creativity during exploration;
- control during production.
Understanding T2V, I2V, and A2V Workflows
One of the most common mistakes is using exactly the same prompting strategy regardless of the workflow.
In reality, the role of the prompt changes dramatically depending on whether you are working with:
- Text-to-Video (T2V);
- Image-to-Video (I2V);
- Audio-to-Video (A2V).
Overview
| Workflow | Primary role of the prompt |
|---|---|
| T2V | Describe the entire scene |
| I2V | Describe what should change |
| A2V | Describe the scene while audio drives performance |
Understanding this distinction often improves results more than adding additional keywords.
Text-to-Video: The Prompt Builds Everything
In a T2V workflow, the model has no external reference.
The prompt must therefore provide:
- the subject;
- the environment;
- the action;
- the camera setup;
- the lighting.
Example:
Medium close-up shot of a cyberpunk engineer,
slow dolly in,
working on a holographic interface,
soft blue neon lighting,
shallow depth of field.
Here, every element contributes directly to constructing the scene.
Whenever possible, I recommend prioritizing Image-to-Video over Text-to-Video. Building a strong source image using image models such as Flux, Qwen-Image, or Z-Image typically provides much greater control over the final result.
Image-to-Video: The Prompt Complements the Image
With I2V, the situation changes completely.
The model already knows:
- the character;
- the environment;
- the composition;
- the color palette.
The prompt no longer needs to recreate this information.
This is arguably the most important principle in Image-to-Video workflows:
The prompt should complement the image, not replace it.
A common mistake
Source image:
- woman sitting in a café.
Prompt:
A woman with brown hair sitting in a coffee shop,
wooden table,
warm lighting,
coffee cup.
The model already has access to most of this information.
Repeating it unnecessarily can introduce conflicts or encourage visual drift.
A better approach
The woman slowly lifts the cup,
looks toward the window,
camera tracking shot,
background remains static.
The prompt only describes what should evolve.
This often improves:
- character stability;
- environmental consistency;
- adherence to the source image.
Audio-to-Video: Let Audio Drive the Performance
A2V is arguably one of the most underrated workflows in LTX 2.3.
Many users still attempt to drive dialogue entirely through text prompts. However, when a high-quality audio track is available, it generally provides a far better guide for:
- lip movements;
- jaw motion;
- micro-expressions;
- facial rhythm.
The most effective strategy is often to reverse the traditional workflow:
- Generate the audio first.
- Use the same TTS voice across all scenes.
- Inject the audio into the A2V workflow.
- Use the prompt only for framing and atmosphere.
Example:
Close-up shot,
natural facial movement,
soft daylight,
35mm lens,
interview framing.
In this setup, the audio drives facial animation while the prompt controls the visual presentation.
A dialogue track helps drive emotion and facial expressions. Ideally, it should be combined with a reference image. The image defines the character’s appearance, while the audio controls dialogue, delivery, and optional sound effects. Additional guidance can also be provided through ControlNet modules such as Depth, Canny, or Pose.
The next section contains several complete prompting examples for T2V, I2V, and A2V workflows that you can use as a starting point for your own projects.
Effective Prompt Examples for LTX 2.3
Now that we have covered the core principles, let’s look at several practical examples.
The goal is not to copy these prompts word for word, but to understand their structure so you can build your own variations.
Text-to-Video (T2V) Example
In a T2V workflow, the prompt must provide all the information required to build the scene.
Prompt
Medium close-up shot of a female android technician,
inside a futuristic repair workshop,
slow dolly in,
she turns her head toward the camera,
raises her right hand toward a holographic display,
soft blue neon lighting,
shallow depth of field,
clean background,
realistic motion.
Why this prompt works
- clearly defined subject;
- simple environment;
- precise movement;
- explicit camera direction;
- defined lighting;
- minimal ambiguity.
The model has very little to invent.
Image-to-Video (I2V) Example
Let’s assume your source image contains:
- a woman sitting on a bench;
- an urban park;
- late afternoon lighting.
A common mistake is rewriting the entire scene in the prompt.
Poor example
A woman sitting on a bench in a park,
brown hair,
autumn atmosphere,
warm sunlight,
trees in background.
Most of this information already exists in the image.
Better example
The woman slowly turns her head,
looks toward the camera,
slight smile,
gentle wind movement in her hair,
slow push in.
The prompt complements the image rather than competing with it.
Audio-to-Video (A2V) Example
In an A2V workflow, the audio already drives a large part of the facial animation. The prompt mainly controls the presentation.
Prompt
Close-up interview shot,
natural facial motion,
soft daylight,
35mm lens,
stable camera,
professional documentary style.
Lip-sync and facial performance will be driven primarily by the audio rather than by the text prompt.
Example Using Timecodes
For more complex scenes, timecodes can sometimes provide additional structure.
[00:00] A man sitting at a desk.
[00:02] He turns his head toward the monitor.
[00:04] He reaches for a coffee mug.
[00:06] He takes a sip.
Slow camera push in.
Again, this technique remains experimental. It does not guarantee that actions will occur at precise timestamps, but it can help establish a logical progression within the scene.
The Most Common Mistakes With LTX 2.3
After months of testing, certain mistakes appear repeatedly.
Using Too Many Adjectives
Poor example:
Epic cinematic masterpiece,
beautiful,
stunning,
award-winning,
incredible atmosphere.
Better example:
Medium shot,
slow tracking shot,
soft daylight,
shallow depth of field.
Technical filmmaking language generally provides more useful information.
Creating Overly Complex Backgrounds
The following types of scenes remain difficult for most video models:
- crowded streets;
- moving crowds;
- dozens of characters;
- extremely detailed environments.
In practice, a simpler environment often results in:
- a more stable subject;
- less morphing;
- better temporal consistency.
Describing Multiple Actions Simultaneously
Difficult example:
A man runs,
waves,
looks behind him,
avoids obstacles,
talks to another character.
Each additional action increases scene complexity.
Whenever possible, split the sequence into multiple shots.
Remember that an AI video model such as LTX 2.3 is primarily a shot generator, not a video editor.
Editing remains an essential step when producing high-quality videos. Whether you use DaVinci Resolve, Premiere Pro, or another editor, post-production helps create a more dynamic final result, hide imperfections, and maintain viewer attention.
Using The Same Prompt for T2V and I2V
This is one of the most common mistakes.
- In T2V: the prompt creates the scene.
- In I2V: the prompt guides changes within an existing scene.
This distinction is critical.
Ignoring the Target Resolution
In general, better results are achieved when generating content close to the final target resolution.
AI upscaling solutions can then be used during post-production to improve image quality without forcing the model to generate at extreme resolutions.
For a deeper look at upscaling workflows in ComfyUI, see this guide.
Frame interpolation and AI upscaling can both be valuable, provided that the source video already has sufficient quality and frame rate. However, these topics deserve dedicated guides of their own.
Overlooking Hardware Constraints
Some issues commonly blamed on prompting are actually caused by:
- poor generation settings;
- incompatible LoRA combinations;
- insufficient VRAM;
- inappropriate model formats;
- excessive offloading.
For example, aggressively quantized GGUF models may reduce quality or introduce unexpected behavior depending on the workflow and hardware configuration.
If you experience instability, freezes, or excessive CPU offloading in ComfyUI, this guide may also help.
In most situations, a simple, coherent prompt tailored to the workflow produces better results than an extremely long and complicated one.
FAQ: Common Questions About LTX 2.3 Prompting
Why Does LTX 2.3 Seem to Ignore My Prompt?
In most cases, the issue is not the model itself.
The most common causes are:
- an overly abstract prompt;
- too many decorative adjectives;
- multiple conflicting actions;
- a Prompt Enhancer that rewrites your instructions;
- an I2V workflow where the text conflicts with the source image;
- similarly, ControlNet workflows where Pose, Depth, or Canny guidance contradicts the prompt.
Before adding more details, try the opposite approach:
Simplify the prompt.
Do Negative Prompts Actually Work?
Yes, but their effectiveness depends heavily on the workflow being used.
Depending on the configuration:
- some workflows handle negative prompts correctly;
- some distilled models reduce their impact;
- some users rely on tools such as NAG-LTX for stronger negative guidance.
If your negative prompts appear to have no effect, verify the workflow first before rewriting the prompt.
Should I Use the Prompt Enhancer?
The Prompt Enhancer is useful when you are looking for:
- inspiration;
- creative ideas;
- prompt variations.
However, when precise control is required, most experienced users prefer to disable it.
In general:
The more complex your workflow becomes, the less useful automatic prompt expansion tends to be.
What Is the Ideal Prompt Length?
There is no magic number.
However, experience consistently shows that a short, precise prompt often produces better results than a long paragraph filled with adjectives.
A useful question to ask yourself is:
Does every word contribute meaningful information about the motion, camera, lighting, or scene?
If the answer is no, that word can probably be removed.
Are Timecodes Officially Supported?
At the time of writing, the official LTX documentation does not describe timecodes as a dedicated feature.
Nevertheless, many users report positive results when using them as temporal markers within prompts.
My own testing largely supports this observation.
Timecodes should therefore be considered an experimental technique rather than a guaranteed capability.
How Can I Generate Faster Motion?
Generic terms such as:
quickly
fast
energetic
often produce inconsistent results.
In practice, it is usually more effective to:
- describe specific movements;
- use appropriate camera terminology;
- break complex actions into micro-actions;
- favor shorter shots combined with dynamic editing.
Why Do My Characters Change Appearance?
This is one of the most common issues in AI video generation.
To reduce character drift:
- use reference images whenever possible;
- keep clothing, hairstyles, and lighting consistent;
- reuse the same core character description across shots;
- avoid major framing changes between generations.
A reference image remains the most effective solution.
What Resolution Should I Use?
Recommendations evolve as new versions of the model are released.
As a general rule:
- avoid unusual resolutions;
- maintain a consistent aspect ratio;
- perform upscaling during post-production when needed.
The official resources remain the most reliable source of up-to-date recommendations:
- Official Documentation: https://docs.ltx.video/
- Official GitHub: https://github.com/Lightricks/LTX-Video
- Official Model: https://huggingface.co/Lightricks/LTX-2.3
Key Takeaways
LTX 2.3 is not an animated image generator.
It is a video model that must maintain scene consistency over time. That distinction fundamentally changes how prompts should be written.
Users who consistently achieve the best results tend to follow the same principles:
- describe physical actions rather than emotions;
- prioritize camera terminology over artistic adjectives;
- break complex movements into smaller actions;
- avoid unnecessarily busy backgrounds;
- preserve character identity using reference images;
- adapt prompts to the specific workflow being used;
- simplify whenever possible.
Finally, keep in mind that many of the techniques presented in this guide come from hands-on experimentation and observations shared by the community.
Video models evolve rapidly, and some methods may become more or less effective as new versions are released.
The best way to improve remains the same:
Experiment, compare different approaches, and gradually refine your workflow.
Additional Resources
- Official LTX Documentation: https://docs.ltx.video/
- Official LTX GitHub Repository: https://github.com/Lightricks/LTX-Video
- Official LTX 2.3 Model on Hugging Face: https://huggingface.co/Lightricks/LTX-2.3
- ComfyUI: https://www.comfy.org/
Your comments enrich our articles, so don’t hesitate to share your thoughts! Sharing on social media helps us a lot. Thank you for your support!